
[ad_1]
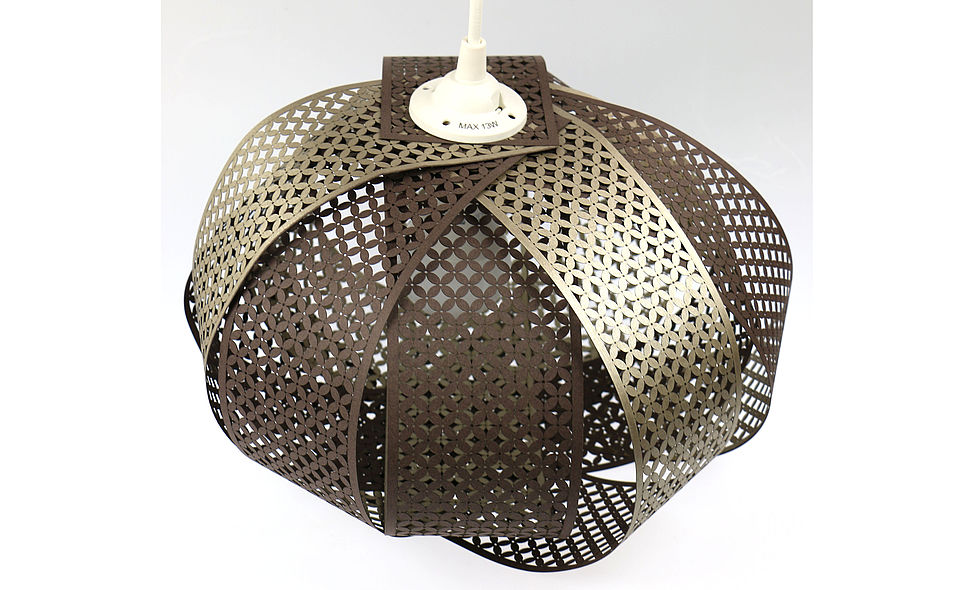
Take a simple bulb holder and produce great ceiling lamp.
Preparation
Required material:
Photo cardboard or thick paper (approx. 180 – 300 g/m²)
IKEA bulb holder (cord set) HEMMA with LED bulb
Material to cover the engraving table (e.g. paper)
Machine used:
Trotec Speedy 400
120 Watt
Tips:
Use a cutting table (honeycomb or acrylic grid) for best cutting results
Use a 1.5 inch lens
Step by Step
Step 1: Import /create design template
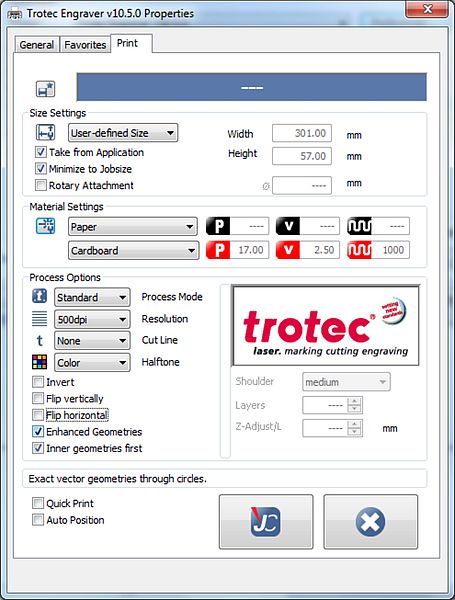
Import our design templates into your graphic program and adapt it to the size of your lamp shade. Send it to the laser with the recommended laser parameters. The parameters might vary depending on the machine used and the available laser power.
TIP:
Once you have positioned your paper into the laser machine, switch on the exhaust and cover the rest of the table with white paper to increase the exhaust performance.
Step 2: Laser Process
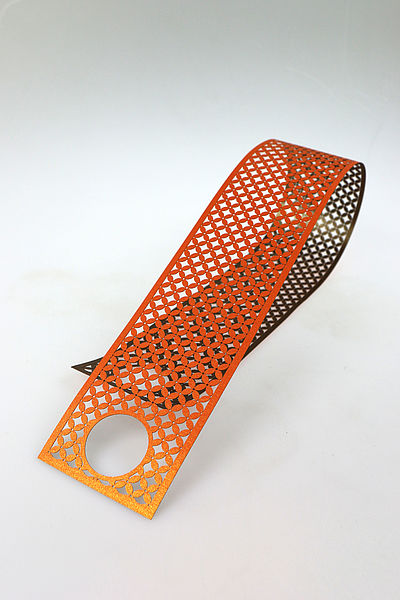
Cut out the design from the paper. For the bulb holder you will need 5-6 paper stripes.
LASER PARAMETERS:
power 17%
speed 2.5%
frequency 1000 Hz
Air Assist on
TIPS:
Select these two options in JobControl® to get perfect cutting results.
Optimized geometries
Inner geometries first
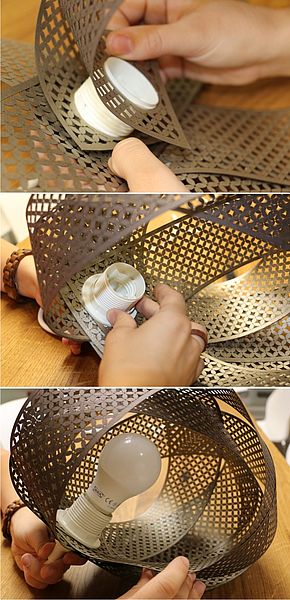
Step 3: Assemble your lamp
Put the laser cut paper strips on the bulb holder. Then put the opposite holes on the holder. Fix it with the carrier ring.
Important:
Only use a LED bulb
Make sure to have enough distance between the bulb and the lamp shade
Downloads
More info, tutorial and templates can be found at the following link :
[ad_2]
Source link